Tuesday, December 31, 2013

Think Spring! New Pattern Available

Happy New Years to you all!

If you're as tired of the Winter as I am, here's something to get you thinking about Spring. It's another WoolFelt Table Runner, called "Bee Skeps and Blossoms," and the pattern is now available in my Etsy and Craftsy stores.


Thursday, November 21, 2013

New Pattern Available!

My Which Came First? Table Runner pattern is now available in my Etsy and Craftsy shops!

Tuesday, November 19, 2013

Black Tie Boogie Blog Hop

I'm happy to be participating in another fun blog hop! Thanks to Vickie and Madame Samm for all their work to organize this one.

So the theme is roosters, hens, chicks, or turkeys and I chose hens/chickens for mine. I've had this design in my brain for a long time, and was happy to have an occasion to bring it to life. It's another table runner that features hexagons as the main shape (like my Patriotic Sheep, Pumpkins on the Vine, and Flaky Snowmen runners).

A hexagon chicken? Yup, it's possible...

 
Her head and body are both hexagons.
 
And her head is tilted because she's asking the age-old question...
Which came first, the chicken or the egg?
 
I don't have an answer for her, do you? In any case, her friends are pondering the question as well. Here they are in the finished 12" x 26" WoolFelt table runner, appropriately named "Which Came First?"
 
 
This pattern will be available in my Etsy and Craftsy shops soon. I hope you like my project!
 
I'll respond to all comments provided you're not a No Reply Blogger. If you are, leave me an email address!

Be sure to visit the other talented folks on today's list (just updated)!
 

 November 19

Thursday, November 7, 2013

For the Boys!

A big thanks to Amy and Madame Samm for bringing us another great blog hop!


First I wanted to show you another of my table runners, the latest to be published in Create & Decorate Magazine. Since it's with Snowmen, I think it's appropriate for this blog hop:


The pattern for the Snowmen Runner is available in my
Etsy and Craftsy shops.

Second, I designed and stitched these stocking ornaments specifically for this hop. They're inspired by the traditional menswear pattern of argyle. They look like argyle socks, but since they're ornaments I'm calling them "stockings."


They measure 6" tall (minus the cording) and 4" wide at the widest point.

And here's the free pattern for you all to enjoy and hopefully make! They're easy to construct and are a great way to use up WoolFelt scraps. Just click on the image below to download.

I'll respond to all comments provided you're not a No Reply Blogger. If you are, leave me an email address!

Be sure to visit the other talented folks on today's list!

November 7th


Elizabeth Coughlin Designs (You're here)


Friday, November 1, 2013

Thursday, October 24, 2013

My Time to be Wicked!

I've been really looking forward to this blog hop! A big thanks as usual to Madame Samm and to Wendy for all their hard work in making this come together.
 
For my project, I designed and hand stitched a 16" table mat/penny rug in WoolFelt that I'm calling "Patch O'Jacks." It was a lot of fun to make and I think the result is quite wicked indeed!


Each Jack has its own facial expression, but they're all happy to be in the patch together!
 
Just for fun, I used Photoshop to blank out the faces to show how the pattern would look with plain pumpkins. Done this way, it's not just for Halloween:


My giveaway for this blog is...this pattern! Just click on the picture below to download the .pdf file. I hope you have fun with it!
Be sure to visit all the other talented people on today's list!

Thursday, October 24th


Elizabeth Coughlin Designs (you're here)


Monday, September 30, 2013

This is a Sew and Show Blog!


Madame Samm is running an amazing giveaway on her blog.
Check it out:

Saturday, September 28, 2013

More Patterns and a New Published Project!

First, I have the free patterns I promised during the Wool Blog Hop. Click on the images to download the .pdf patterns/instructions:


And next, my latest WoolFelt project currently appearing in the Holiday 2013 issue of Create & Decorate Magazine.
 
This pattern will be for sale in my Etsy and Craftsy shops (links on the left side of this blog).


Wednesday, September 25, 2013

Wool Lovers Blog Hop

Pieced Brain

A big thanks to Denise for hosting and organizing this blog hop!

Almost all my projects use wool or WoolFelt, so I could post a lot of pictures of things I've made. But instead, I'll just refer you to my Etsy shop, and you can see a lot of my work there.

For my first project for this hop, I decided to do something that would use up some of the wool scraps I have in my stash. I designed a very simple candle mat, which measures 12" square, and is all hand-stitched:

Front:
Back:
 
For my second project, I stitched up this pincushion which also uses scraps from my stash.
 
It's an amalgamation of various traditional floral block patterns I've seen. I just put the elements that I liked together, and I'm pretty happy with how it came out. It measures 6" square and is hand stitched with some Valdani floss I had on hand. It's going to be a gift for someone on my holiday list!
 
Side View
 
I will make the tutorial/patterns for both of these projects available for free on my blog after the hop is over.

Be sure to visit the other talented people on today's list!

Wednesday, September 25

Elizabeth Coughlin Designs (you are here)

Maria do Carmo (Pieced Brain is hosting)

Wednesday, September 18, 2013

Free Floral Pincushion Trio Pattern!

Here's the link to the free pattern I promised during the "Pin It" Blog Hop. Just click on the image to access the .pdf file, which is also listed under "Free Patterns/Tutorials" on the left side of this blog.

The pattern shows you how to make all three flower types.
 
Enjoy!
 

Wednesday, September 11, 2013

Pin It Blog Hop!

Here we are in another great blog hop. Thanks to Madame Samm and Kristen for all their organizing and cheerleading!


For this blog hop I've designed a trio of floral pincushions. They're all formed by gathering WoolFelt over wide-mouth Mason Jar lid rims. The rims make it very easy to stuff! The flowers are made from WoolFelt as well, and they're all stitched with DMC floss. I will be making a free pattern available on my blog after the hop has ended. The pattern will be for all three styles of flowers. I hope you like them!


 Be sure to visit the other talented folks on today's list:


Elizabeth Coughlin Designs (that's me!)

Friday, September 6, 2013

Another New Pattern!

The pattern is now available for my Pumpkins on the Vine Table Runner, which appeared in the Sept. issue of Create & Decorate Magazine. It's in .pdf format only, and listed in both my Etsy and Craftsy shops.


Tuesday, September 3, 2013

My Etsy Shop: Free Shipping in US!

I've added several finished handmade pieces to my Etsy shop. Any finished piece will be shipped for free within the US until Dec. 1st!

Thursday, August 29, 2013

Patterns, Patterns, and More Patterns!

I have three new patterns to tell you about...yup THREE! Two are for sale in my Etsy and Craftsy shops, and one is a free pattern available to everyone!

First up is a pattern for the wool felt and cotton project I just did for the "I'm a Hexi Queen Blog Hop":

Next, is a re-working of the piece (again in wool felt and cotton) I did for the "For the Birds Blog Hop":
And finally, here's the link for the FREE pattern for my (cotton with wool felt accents) Hexi-Pumpkin Candle Mat, which I also created for the "I'm a Hexi Queen Blog Hop": (click on the image to get the .pdf file).
 
And one more thing... if you've already downloaded my free Floral Pincushion pattern, please download it again. I've made a few minor changes in the instructions.
 
Whew!
 

Wednesday, August 21, 2013

I'm a Hexi Queen!

Here we are in another great blog hop! A big thanks to Madame Samm and Debby for all their hard work and support.

The timing of this blog hop coincides with the publication of a series of table runners I designed, using hexagons, for Create & Decorate Magazine. The first was printed in the July/August issue:

 
As you can see, the sheep have hexagons for bodies.
 
The second table runner is in the current issue, with hexagon pumpkins:
 
 
And the third (in the Holiday issue) will be hexagon snowmen, but I'm not able to show you a picture of that one before it appears in the magazine.
 
Anyway...back to this blog hop! I've created two projects, the first one is a little pumpkin candle mat.
 
 
I cut out 14 hexagons and applied fusible fleece to half of them. Then I paired up a fused piece and a non-fused piece right sides together, added in the wool felt stems, and sewed together with a 1/4" seam leaving the bottoms open. I turned them right sides out and whip stitched the bottoms closed. Then, I whip stitched the hexagons to each other on the back, added three wool felt leaves on the front and did some simple machine quilting. The candle mat measures 12" from stem to stem.
 
The second project is an appliqued table mat that I'm calling "A Bed of Hexi-Roses." The roses are folded-petal hexagons. They start out like this:
And end up like this:
 
 
I added more hexagons for the centers, and some leaves. All the stitching is done by hand with DMC floss and a blanket stitch.
 
As in my poinsettia project that I did for the Ho Ho Ho Blog Hop, the whole piece is constructed from wool felt, with a cotton backing and binding.

Here's the finished piece:
I will be making the pattern for this project available for sale soon in my Etsy and Craftsy shops.

Would you also be interested in a free pattern for the pumpkin candle mat? Which project do you like better? (I will be offering a free pattern for the pumpkin candle mat if there's enough interest. The Hexi-Rose pattern will be for sale soon.)

Please leave me a comment and let me know. Thanks!

Be sure to visit the other talented participants on today's list:

Wednesday, August 21

Thursday, August 15, 2013

Giveaway Winner and New Published Project!

Congratulations to Margaret in AR who is the winner of my Ho Ho Ho Blog Hop Giveaway! She has won my Poinsettia Gift Tag Ornaments. Enjoy Margaret!

I have another published project in the current (Sept./Oct.) issue of Create & Decorate Magazine:

It's the second of three WoolFelt table runners. The third (snowmen) will be in the Holiday issue which I believe comes out in October.

Monday, August 5, 2013

New Patterns!

As promised, my Potted Poinsettia Party Table Mat pattern is now available!

It is for sale in .pdf format in my Etsy Shop and my Craftsy Pattern Store.

And click on the picture below for the FREE pattern for my Poinsettia Gift Tag Ornaments:

Friday, August 2, 2013

Ho Ho Ho!

I'm excited to be part of another great blog hop! These hops are really stretching my creativity and enhancing my skills. I'm trying techniques and ideas I've never attempted before. In the last hop, I did machine quilting for the first time. In this one, I'm tackling bias binding around a circle, but more on that later lol. First of all, a big thanks to Madame Samm and Carol for all their hard work and support.

My favorite Christmastime motif is the poinsettia, so I decided to design an appliqued piece with them. Now poinsettias always come in pots, right? So the title of my piece is "Potted Poinsettia Party." Poinsettias come in many colors, although red is primary one used in holiday décor. For fun, and the look it achieved, I included a non-traditional color in the project...pink!

I came up with my design and hand-appliqued the entire top with DMC floss. The appliques are all pieces of wool felt from my stash. The background is also wool felt, and the entire piece is backed and bound with cotton. Buttons were added for the stamen in the centers.

After finishing the applique, I attempting the bias binding. I cut 4" wide bias strips; joined them together (per this demonstration); folded the whole thing in half; stitched it on with a 1/2" seam; folded the binding back and hand-stitched it on the back of the piece. It wasn't too difficult and I think it came out well!

Anyway here's the finished piece. It measures 16".


The pattern for this project will be available soon in .pdf format in my etsy and craftsy shops.

For a giveaway, I took my same applique shapes, made them slightly smaller, and created a set of poinsettia gift tag/ornaments. They can be hung as ornaments or tied onto gifts! I'm giving away a set of three...just leave a comment and you'll be entered into the random drawing. I will also soon make the pattern for the ornaments available for free on my blog!


Be sure to visit the other creative people on today's list!

Elizabeth Coughlin Designs (that's me!)

Monday, July 1, 2013

New Pattern Available!

My "Patriotic Sheep Table Runner" pattern (which appeared in the July 2013 issue of Create & Decorate Magazine), is now available in .pdf format in my etsy and craftsy shops (links to the left). It will also soon be available in printed form at the Quilted Crow in Boxborough, MA.

Friday, June 28, 2013

I Put A Stamp On It!

Reminder: If you're still a Google Reader subscriber, switch to following me via Bloglovin. Just click the button to the right!

I'm happy to be participating in another blog hop. Thanks to Madame Samm and Thearica for cheering us on in this one!

I knew right away that I wanted to do a stamp set instead of a single stamp, and that I wanted to do something old-fashioned looking. And most importantly, for ease of making this project, I wanted to do a faux-stamp edge. But more on that later.

I started looking around for clip art that I could use to create four stamps within a stamp set. And I found an awesome artist on Etsy, and purchased this clip art. Isn't it great? My theme became clear...Gents!

I imported the clip art into Photoshop, and added text. I randomly picked 5 cents as my stamp price, because I've always liked the number and I was trying to be old-fashioned! But later on in the process, I decided to use the price of a stamp in the year I was born (1963). And what do you think that turned out to be? Yup, 5 cents. So either I'm psychic, or I accessed some latent memory, because I assure you I did not consciously recall the price of a stamp from 50 years ago!

Anyway, back to the project...

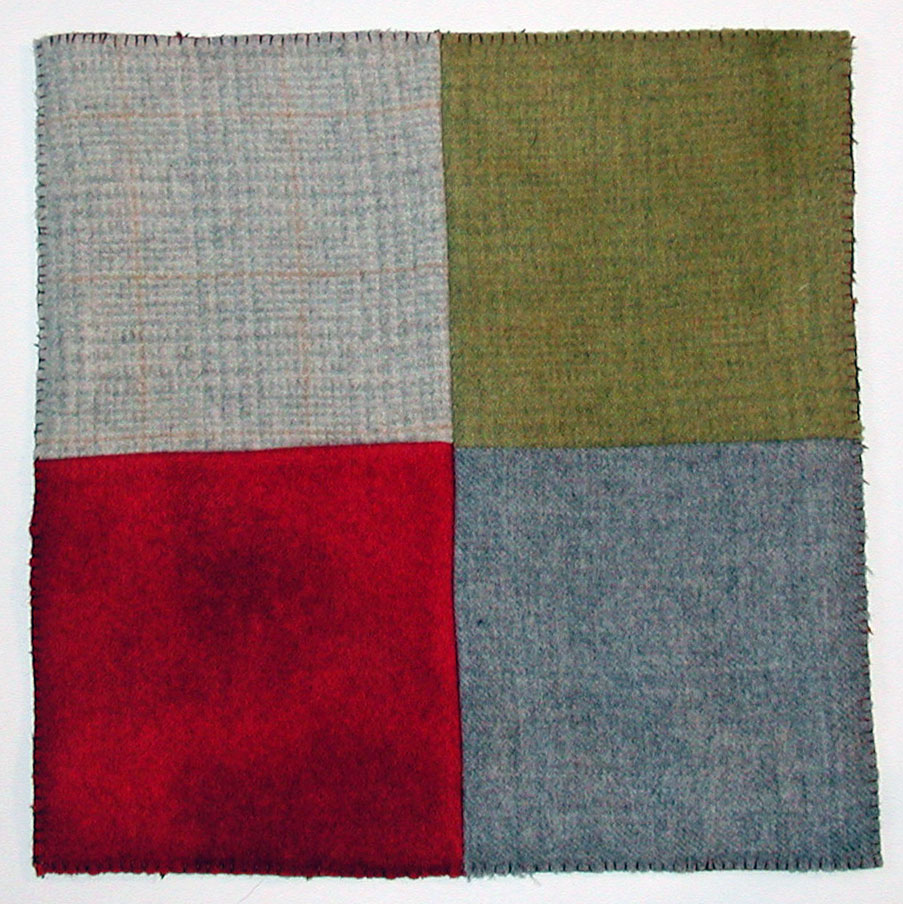
Next, I selected a linen-look cream fabric for my backgrounds. I wanted to do black on cream, so I used black wool felt for my appliques. I printed my graphics out and traced them all onto freezer paper. I then cut them out from the black wool felt with fusible web applied to the back. For the blocks, I used my 12.5" square ruler, and added fusible fleece to give the fabric body and to use as the batting. I hand appliqued the designs with two strands of black DMC floss, and stitched an interior border with six-strands. Here's one of the blocks:

 After appliqueing all four blocks, I joined them together with 1/4" seams:

Here's where the faux-stamp edge comes in. I looked around for a trim that I could use. I was thinking about jumbo ric-rac, but then I found this ric-rac ribbon. It's thinner than traditional ric-rac and wider, and I thought it would work well. (I actually purchased the ribbon through amazon.com.)

Using a zig-zag stitch near the edge, I machine-stitched the ribbon over the seams where the blocks were joined. I realize that stamp books don't usually have black backgrounds, but I wanted to set off the cream-colored stamps and give them the illusion of a wavy edge.
Then, I added it to the outside edges so that half of the ribbon was hanging off. I planned to use this as my binding later. Next, I cut another piece of the beige fabric for my backing, and did some quilting. This is my first real attempt at machine quilting, and to be kind to myself I'll say it turned out "rustic." But it actually worked pretty well with the folk art feel of the piece. I quilted around each stamp border, following the waves of the ribbon. Then, I quilted a box just inside of the inner borders. I left the area around the designs alone so they'd stand out more. Finally, I folded the ribbon over the edges, and hand stitched it on the back, and added a sleeve on the back for a dowel for hanging.

Here's the final piece...from a distance so you can't see my messy quilting too well I hope!

All-in-all I'm happy with how it turned out! It measures 24" square (more or less), and will eventually hang in our home office.

I'd appreciate any comments you'd like to leave, and be sure to visit the other creative people on today's list!


Thursday, June 6, 2013

Giveaway Winner!

Congratulations to Evelyn from Ontario who won my "Say It With Flowers" blog hop giveaway! It'll be in the mail to you very soon Evelyn.

Wednesday, June 5, 2013

Free Pattern: Floral Pincushion

I created this pincushion for the "Say It With Flowers" blog hop, and thought I'd put it up on my blog as a freebie for you all.

 
This pattern is for your personal use only. Enjoy!
(Click on image to access the .pdf file.)